PostgreSQL

PostgreSQL and Dot NET Core
Previously, I demonstrated a .NET Framework Web API using PostgreSQL for the backend datastore.
For deployment to DigitalOcean, in a linux Docker container, it is better to use .NET Core, which is cross platform.
For deployment to DigitalOcean, in a linux Docker container, it is better to use .NET Core, which is cross platform.
How To Setup A .NET Core Web API With PostgreSQL
To get the show on the road, I am going to create a HelloWorld .NET Core Web API that uses PostgreSQL for the backend datastore.
My setup: I am running
Windows 10 with Visual Studio 2017. I am using the .NET Core 2.2 SDK, and I have PostgreSQL running in a Docker container on my local machine. The Docker container has exposed
port 5433. Using pgAdmin4, I have created PostgreSQL login 'JimmyPage' with password 'Kashmir'.
Step 1.
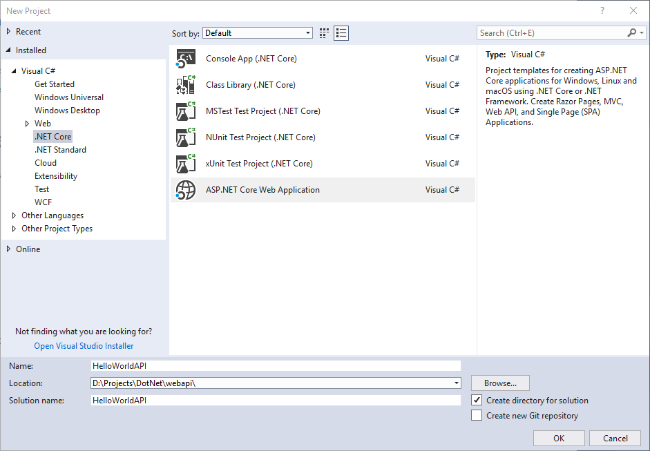
In Visual Studio 2017, create a new ASP.NET Core Web Application project, HelloWorldAPI

Step 2. Select the API project template, uncheck the Configure HTTPS checkbox, and make sure ASP.NET 2.2 Core is selected.
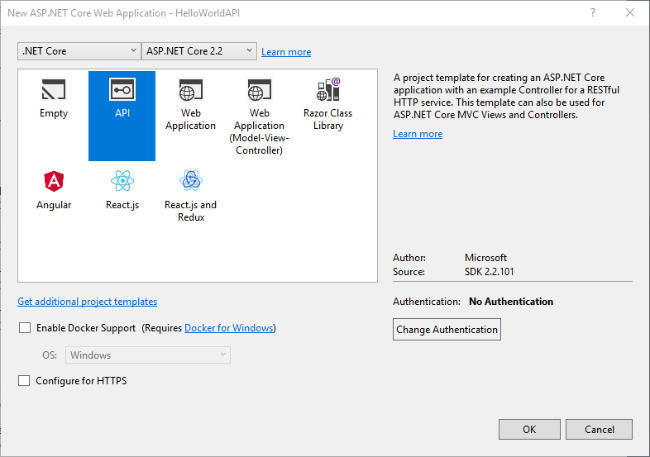 Click OK.

Step 3. Let's add the very useful Swagger. Right click the project in Visual Studio, and then click on "Manage Nuget Packages…"
Step 4. Search for "Swashbuckle.AspNetCore" under the browse tab and install Swashbuckle.AspNetCore in your project..
(Another way to install Swagger is via the Package Manager Console, in which case you would use the command: Install-Package Swashbuckle.AspNetCore)
Step 5.
In Startup.cs, we inject Swagger by adding the following to the ConfigureServices method:
       // Register the Swagger generator, defining 1 or more Swagger documents
          services.AddSwaggerGen(c =>
          {
           c.SwaggerDoc("v1", new Info { Title = "HelloWorld API", Version = "v1" });
          });
and also add a new using statement:
using Swashbuckle.AspNetCore.Swagger;
Step 6. Having injected Swagger, now we configure it in the Configure method:
After the app.UseMvc() line in Startup.cs, add the following:
     //Enable middleware to serve generated Swagger as a JSON endpoint.
       app.UseSwagger();

     // Enable middleware to serve swagger-ui (HTML, JS, CSS, etc.),
     // specifying the Swagger JSON endpoint.
     app.UseSwaggerUI(c =>
     {
       c.SwaggerEndpoint("/swagger/v1/swagger.json", "Hello World API");
     });
Step 7.
Now press F5 (or Ctrl F5), and enter /swagger after the root: (http://localhost:portnumber/swagger) to reveal the Swagger page:
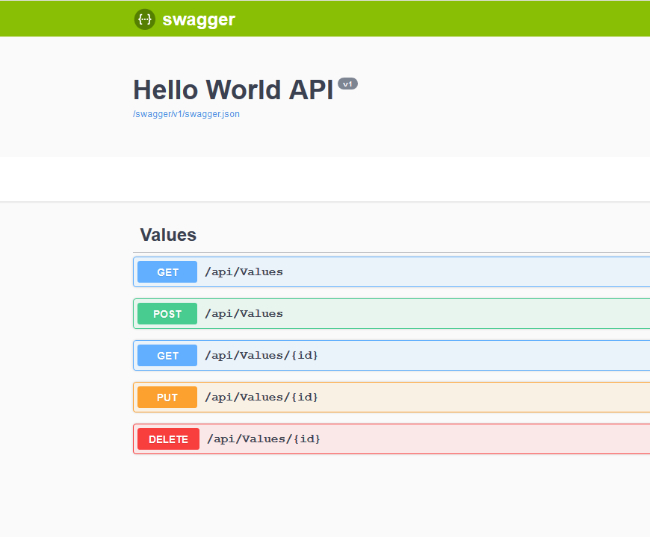 The api/Values that is shown is part of hard coded boilerplate generated by Visual Studio. Useful for verifying Swagger is setup correctly, but we no longer need it.
So, in the Controllers folder, delete the ValuesController.cs file. We will add our own Entity class and Controller.

As before, we add a Book.cs class to represent our entity. Create a new folder, Models, and in it
add a file Book.cs with the following Books class:
   using System.ComponentModel.DataAnnotations;

    namespace HelloWorldAPI.Models
    {
        public class Book
        {
            [Key]
            public int Id { get; set; }

            public string Title { get; set; }

            public string Author { get; set; }
        }
    }
(Please note: In an actual real word, non-Hello World API, a DTO(s) would be used here.
Using an entity for a view model is brittle...Having said that, it has the advantage of keeping this
article small, and quickly getting to the PostgreSQL part.)
Step 8. Now we can add an EntityFrameworkCore.DbContext.
In the Models folder, add a new class file BookContext.cs, with the following class:
    using Microsoft.EntityFrameworkCore;

    namespace HelloWorldAPI.Models
    {
    public class BookContext:DbContext
    {
        public BookContext(DbContextOptions<BookContext> options)
            : base(options)
        {
        }

        public DbSet<Book> Books { get; set; }
    }
}
Step 9. Now we install the Npgsql package, and register the database context .
As before, we have to install the Npgsql package via the Package Manager Console:
Install-Package Npgsql.EntityFrameworkCore.PostgreSQL -Version 2.2.0And then update Startup.cs and add services.AddDbContext code:
public void ConfigureServices(IServiceCollection services)
   {
    services.AddDbContext<BookContext>(opt => opt.UseNpgsql("host=localhost;port=5433;database=HelloWorldAPI;user id=JimmyPage;password=Kashmir;"));
    services.AddMvc().SetCompatibilityVersion(CompatibilityVersion.Version_2_2);

    // Register the Swagger generator, defining 1 or more Swagger documents
    services.AddSwaggerGen(c =>
    {
       c.SwaggerDoc("v1", new Info { Title = "Hello World API", Version = "v1" });
    });
}
Step 10
Now we add the controller for Books.
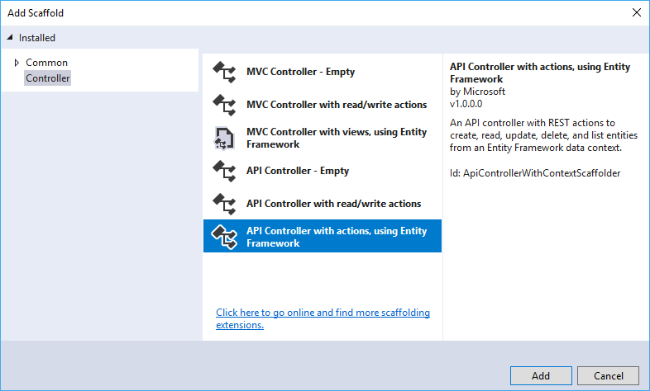 Click Add, and on the next dialog, select the Book class, the Book context:
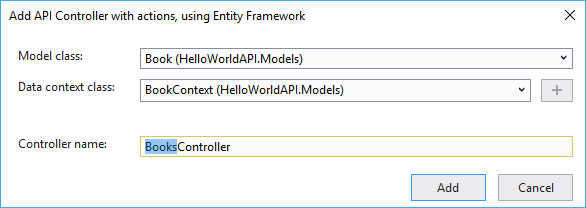 Click Add.

Step 11. In the package manager console, type Add-Migration 'initial migration' and press enter.
One more time, in the package manager console, type 'update-database', and press enter.
This should create the database, after which the API is ready to go.
Step 12. Finally, press F5 (or ctrl F5) to launch the API and Swagger to test it.
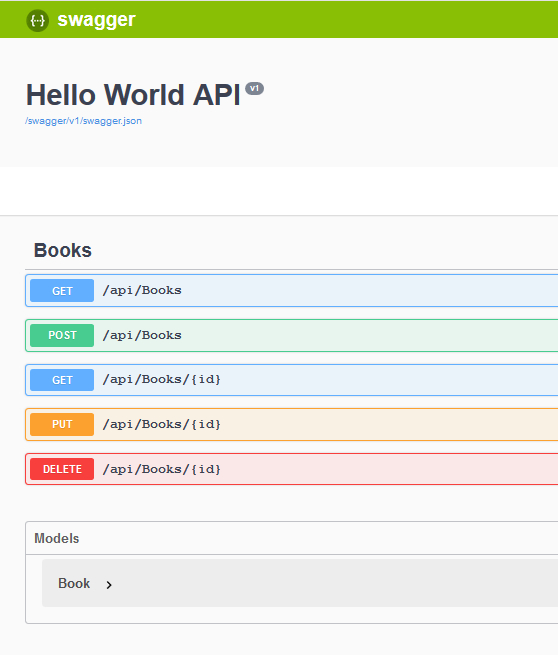

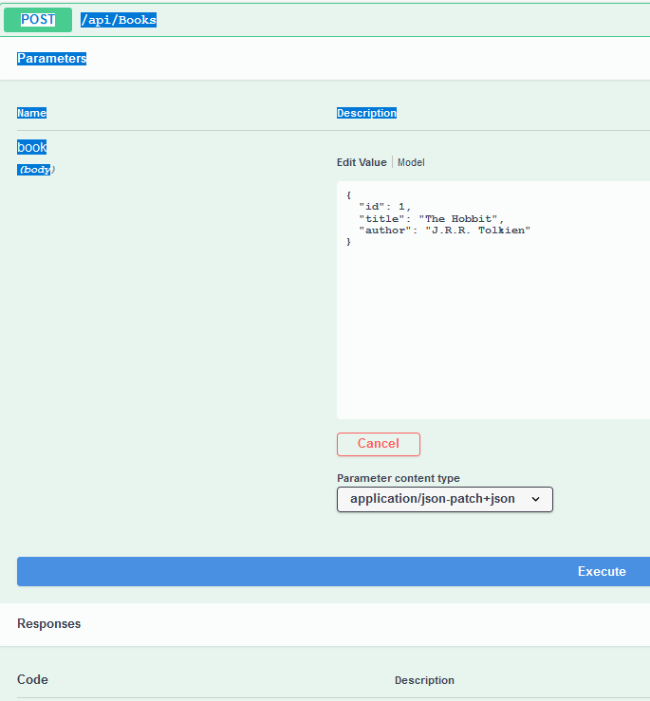
Step 13. Hopefully, everything works (on your machine!) and you should be able to post a book to the API and have it
saved in PostgreSQL:

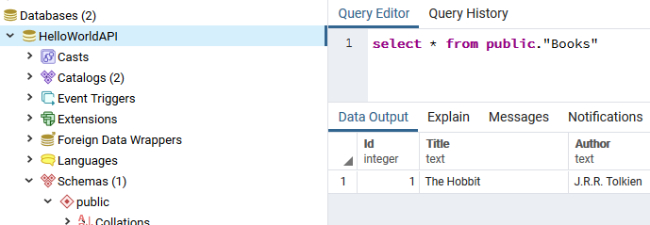
Step 14. Verify that indeed you are saving to PostgresSQL (and not SQL Server) by viewing the database in pgAdmin4:

 Cogitations on Physics, Math, and Computers